Wednesday, June 30, 2010

Ginger Almond Biscotti

This recipe is from the July 1999 issue of Gourmet Magazine and it's my choice for Gourmet unbound for this month.
Because I chose to spend a little extra time outside today, I wanted a quick and easy cookie recipe and this one is sure it!
If you like..let me make that..if you love ginger, then this one's for you! You get two hits of wonderful ginger flavor coming from not only the crystallized ginger but also from the ground ginger.
This is a more traditional biscotti because it uses only eggs and no other fat, like butter or oil. It does come out a little bit hard and wonderfully crunchy but you slice it quite thin, which makes the crunch so good!
After reading some of the reviews for this cookie, I decided to take some of the advise and throw the crystallized ginger into the food processor with the sugar to chop it up. The ginger is so sticky that this step really helped make quick work of the otherwise tedious chopping step. ( I actually miswrote the ginger amount and only added 1/4 cup rather than 1/2 cup and it was really more than enough ginger for me).

In mixer bowl, beat the egg, egg white and vanilla.
Then stir in the flour mixture and beat til well combined.
Stir in the almonds ( I used sliced, toasted almonds because that's what I had on hand) and crystallized ginger.


Form a log and bake it for about 30 minutes.


Let it cool at least 30 minutes to allow slicing easier and with less crumbling because you are going to slice it thinly.


Place it back on the cookie sheet for the second baking.


Ginger Almond Biscotti ( adapted from Gourmet Magazine July 1999 issue)


3/4 cup whole almonds with skins, toasted, cooled and coarsely chopped ( I used toasted and sliced almonds)
1/2 cup crystallized ginger ( I used 1/4 cup)
1 cup AP flour
1 1/2 tsp. ground ginger
1/2 tsp. salt
1/4 tsp. baking soda
1 large egg
1 large egg white
1/2 tsp vanilla
Preheat oven to 300. Line cookie sheet with parchment paper.
1. Finely chop ginger. ( Or place ginger with sugar in food processor and pulse til ginger is coarsely chopped.
2. In a small bowl, mix flour, sugar( if you hand chopped ginger), or sugar/ginger mixture ( if you used food processor), ground ginger, salt and baking soda.
3. In mixer bowl, beat egg, egg white and vanilla.
4. Stir in flour mixture and beat til well combined.
5. Stir in almonds and crystallized ginger ( if you hand chopped it).
6. Place dough on baking sheet and form into a log, using damp fingers or a wet knife to form log.
7. Bake approx. 30 minutes, or til browned on top and slightly firm when pressed on top.
8. Lift log off with parchment paper and allow to cool on wire rack for about 30 minutes.
**If you cut it when it's too warm, it will most likely crumble too much.**
9. Cut the slices about 3/8" thick on the diagonal and place back on the baking sheet without the parchment paper.
10. Bake 8 minutes on each side (still at the 300 oven temp.). Cool on wire rack. The biscotti will keep for up to 2 weeks in air tight container. (I would keep it in a cookie tin.)

Blueberry Picking

Today was the perfect summer day! It was bright and sunny with no humidity..perfect for doing just about anything outside. Like picking blueberries. Sure you can just go to the local market and buy a few pints, but why miss out on the chance to hang out with your son, enjoy the weather and gather sweet delicious berries!
While Kris was getting as many berries as he could, I noticed behind us the beautiful garden and couldn't resist photographing this yellow summer squash almost ready to be picked. I can't wait for the zucchini blossoms again this year. Have you ever fried them? Or stuffed them? They're so good!


Tuesday, June 29, 2010

Ultimate Double Chocolate Cookies

I came upon a cookie called "Better than Brownies Cookies" and it looked so good! Nice and chocolatey and gooey and thick. Just the way we love them!
The recipe I found here, but it first came from here..but before that it came from here!
Funny how a recipe travels around the internet. Anyway, even with all those photos to refer to and recipes to read, I still came out with a flat cookie. Not at all thick and fat like all those other cookies.
Coincidently, I found an ad in one of Martha Stewart's Magazines for Ghirardelli chocolate chips that included a recipe that was almost identical to this "Better than Brownies" Cookie. Since I actually even had Ghirardelli chocolate chips and the bittersweet chocolate in the house, I quickly made that one..well I halved the recipe. It called for chilling the dough, which made sense to me as the dough is really soft and chilling firms it up. Funny that the other never mentioned this step!
The cookie uses bittersweet chocolate melted in the dough and semisweet chocolate chips along with walnuts. If you don't like walnuts you can sub pecans or just leave out the nuts entirely. We've grown fond of walnuts around this house! But pecans would also be great. The cookie bakes up nice and thick and chocolatey and gooey! And even though it's called " Ultimate Double Chocolate Cookies" a better name would be "Better than Brownies Cookies!"

These are the only 3 cookies that came out well enough to show you from the first recipe! See how flat they are. They tasted good but I wanted them thick! I kind of also wanted more than 3!


So to make the Ultimate Cookies start by melting the bittersweet chocolate with the butter in a double boiler over low simmering water.
Beat your eggs and sugar til thick, then add the cooled melted chocolate/butter mixture.
Stir in the flour and baking powder.

Stir in the chips...


Add the nuts and chill for an hour. The recipe says to roll into a log but as I've mentioned before, I don't do log rolling!
Pretty darn easy! Kind of like making brownies, just a few bowls and a few steps.

Scoop out dough using a cookie scoop. I used a small scoop and my cookies came out about 2 1/2" across. You can make them bigger if you like.
Pop them into the oven and bake for 12 - 14 minutes.

Ultimate Double Chocolate Cookies ( adapted from a Ghirardelli cookie recipe ad)

Makes 2 dozen or more, depending on size

1 bag ( 11.5 oz.) Ghirardelli 60% Cacao Bittersweet Chocolate Chips
6 tbsp. unsalted butter
3 eggs
1 cup sugar
1/3 cup AP flour
1/2 tsp. baking powder
1 bag ( 12 oz.) Ghirardelli semisweet chocolate chips
1 cup ( 4 oz.) chopped walnuts
1. In double boiler over very low simmering water, melt the butter and the bittersweet chocolate chips, stirring often. Take off the heat and set aside to cool slightly.
2. In large bowl with an electric mixer, beat eggs and sugar til thick.
3. Stir in cooled melted chocolate mixture.
4. In a small bowl, stir together flour and baking powder and stir into the chocolate mixture.
5. Gently mix in the chips and nuts.
6. Refridgerate the dough for an hour to firm it up.
7. Preheat oven to 375,
8. Scoop balls of dough onto a parchment lined baking sheet placing about 2" apart.
9. Bake 12 to 14 minutes or til shiny crust forms on top but interior is still soft.
10. Cool on baking sheet.


Sunday, June 27, 2010

Lime Sugar Cookies

I was flipping through the cookie recipes from Gourmet Magazine to prepare my next post for gourmet unbound when I came upon these lime cookies. The recipe sounded really good and it received many positive reviews, but I was too impatient to wait til the end of the week to make them!
I halved the recipe and changed it a little. I never made the "lime sugar" they referred to. I just threw in lime zest with the butter and sugar mixture. Then after forming the dough into balls, I rolled them in sugar and lime zest.
They came out nice and crunchy on the edges and chewy in the middle. A definitely delicious cookie! And the lime flavor really comes through!
If you want a smaller cookie, just make your balls smaller than I made mine. I made the balls about 1 1/2" in size. and my cookies came out about 3 1/2" in diameter.

Zest some lime zest and set aside for a minute.
Beat the butter and sugar and then throw in the lime zest.

Beat in the egg and vanilla, then add the flour and mix til it's all combined.

The original recipe says to form into a log but I never have any luck with forming cookie doughs into logs! So I just formed them into balls and rolled the balls in sugar and more lime zest.
Then pop into the fridge for at least 2 hours to get them to firm up.


Sprinkle a cookie sheet with some sugar and place the balls onto the sheet.
Gently press each ball to about 3/8" thickness.

They do spread out quite a bit..but in a good way!


Lime Sugar Cookies ( adapted from Gourmet Magazine July 2000)
Makes about 2 dozen, dpending on size

6 tbsp. unsalted butter, softened
2 tbsp. cold vegetable shortening
1 cup sugar
2 tbsp. lime zest
1 large egg
1 tsp. vanilla
1 1/4 cup AP flour
1 tsp. baking powder
1/2 tsp. salt
Approx. 1/3 cup sugar mixed with 1 tbsp. lime zest (for rolling balls)


1. Beat butter, shortening, sugar and lime zest in mixer til light and fluffy.
2. Beat in egg and vanilla.
3. In a small bowl, combine the flour, baking powder and salt and on low speed, add to the egg mixture til just combined.
4. Transfer the mixture to a bowl and place into the fridge to chill for at least 2 hours.
5. Preheat oven to 375 and sprinkle sugar onto your baking sheet.
6. Once the dough has chilled and become firmer, shape into small balls, about 1" in size and roll in the sugar/lime zest mixture. ( If the dough becomes too soft, pop into the freezer for a few minutes).
7. Place the balls on the baking sheet, spacing 3" apart ( they will spread) and gently press each one with the bottom of a glass to about 3/8" thickness.
8. Bake for 10 - 12 minutes. The edges should be slightly golden.
9. Cool 30 seconds to barely 1 minute only on sheet then loosen each cookie carefully ( if you don't loosen the cookies in time, they will stick and possibly break so be sure you do this step as soon as they are managable to loosen), and continue to cool on sheet 5 minute. Then transfer to wire rack.

Thursday, June 24, 2010

Cheese Blintzes with Blueberry Sauce

It's been years since I made blintzes and I've been thinking about them a lot lately. I had a friend many years ago that gave me her recipe and I was making them nonstop back then.

Blintzes, although mainly popular in Jewish cuisine, take many forms and names, depending on the country. France has the crepe, Russia has the blini or bliny, although this, I believe, is made with yeast.

When I looked for my friend's recipe in my shoebox filled to the brim with old hand written recipes from friends and family, I didn't see it. So after checking other recipes on line I actually decided to use a fabulous manicotti recipe I make and just add a little sugar! So, add another country to the list..yup..Italy has the manicotti! This manicotti recipe, by the way, is so great that if you need that recipe, use this one but leave out the sugar. They are light as air, thin and delicate.
For the filling I used a mix of cottage cheese and sour cream. I added some lemon zest, which goes so well with the blueberry sauce. Top with a dollop of sour cream and you've got one great dessert. Great for breakfast, too!


It gets messy..but it's so good!
Whisk the eggs, milk, sugar and butter in a large bowl.
Gradually whisk in the flour and salt and mix til smooth.
Refridgerate at least 1 hour.


I bought the type of cottage cheese that has quite a bit of liquid. Drain out as much liquid from the cottage cheese as possible. Just push down the cheese through a strainer. If you find a cottage cheese that is thicker you won't have this step.


Place the cottage cheese, sour cream, lemon zest, salt and sugar in a small bowl and stir to combine. Pop in the fridge to chill about 1 hour.


Once the batter has been chilled, give it a good stir, then get your pan ready to make the blintzes.
I use a nonstick pan and I highly recommend it!
Place a little butter in the hot pan and swirl it around to coat.
Using a ladle, scoop some batter and pour into your pan, rotating and swirling the pan til it spreads and forms a nice circle. Don't worry..the first is always the most difficult!
Always start your heat on high, but turn down to medium high. You want a nice consistent heat throughout the cooking. You may not need to use too much butter for the pan, as there's a lot in the batter.
When it begins to look slightly brown on the edges, flip it over carefully, using a spatula.
Let it cook only about 30 seconds on the second side.
Then shake it out of the pan and onto a plate.


Keep going til they're all cooked, stacking them as you go.


Once they're all stacked, take each one and place a heaping tablespoonful of the filling onto the center.


Fold the bottom up, then fold over each side, then flip over for the final fold.


And you have nice neat little blintz packages waiting to be heated in more butter!

For the sauce, in a small saucepan, heat your blueberries, sugar, butter, lemon juice, cornstarch and salt. Bring to boil, then lower to a simmer and stir til berries begin to break down and release their juices. Set aside to cool down.

Makes a great sauce.

Cheese Blintzes with Blueberry Sauce
Makes 12 - 15 depending on size
Filling:
16 oz. cottage cheese
1/4 cup sour cream
1 tsp. lemon zest
1 1/2 tbsp. sugar
1/2 tsp. salt

Blintzes:

3 large eggs
1 1/2 cups milk
3 tbsp. melted butter
1 cup AP flour
2 tbsp sugar
Pinch of salt

Sauce:
2 cups fresh blueberries
6 tbsp. sugar
1 tbsp. butter
2 tbsp. fresh lemon juice
1/2 tsp. cornstarch
Pinch coarse salt
To make blintzes:
1. In large bowl, whisk eggs, milk, sugar and butter.
2. Gradually whisk in flour and salt and mix til smooth.
3. Refridgerate for 1 hour.
To make filling:
1. Combine cottage cheese ( drained as in notes above if necessary), sour cream, sugar, lemon zest and salt.
2. Cover and refridgerate 1 hour.
To make sauce:
1. Stir all the ingredients in a small saucepan place on high heat just til mixture begins to boil. Turn down the heat to a simmer, stirring constantly, til the berries just begin to break down and release their juices. Set aside.
To assemble:
Referring to my notes above:
Make the blintzes, stacking them as they are made.
Fill each one with the filling and fold over.
Once they're all made heat a nonstick pan and coat lightly with butter.
Cook the blintzes on medium low heat on both sides. It's better to cook them slowly over low heat so the insides heat up nicely and they don't get too browned.
Serve with a dollop of sour cream and some blueberry sauce.
Note :
The blintzes can be frozen, unfilled. Be sure to put plastic wrap between each layer.
The filled blintzes can also be frozen, uncooked.


Tuesday, June 22, 2010

Boston Cream Pie

This recipe comes out of one of the older cookbooks I recently picked up at a flea market. The book, "A Taste from the Past, Good Old Food", has many wonderful recipes with charming stories to go along with each dish. This pie, which is actually a cake, ( as better explained here), is usually made with a custard filling but this particular recipe fills the layers with a slightly sweet whipped cream and topped with a semisweet chocolate ganache.
It turned out truly delicious. I, however, messed up a little because I think I bake the cake a little too long. But once combined with the whipped cream filling and the ganache..it was still heavenly! Here's a good youtube video to show you technique.
There are , like lots of recipes, many different versions on how to make the cake. This seemed just as involved as any other I read. Perhaps using cake flour might have resulted in an even lighter cake?


I took no time in diving right in!

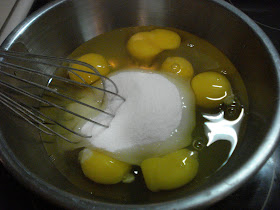
So to begin, put the eggs and sugar in a heatproof bowl over hot, but not simmering water.
Stir with a wire whisk until the sugar dissolves ...


And the mixture reaches 110 degrees.


Then pour into a medium sized bowl and beat. I used an electric hand held beater.
Beat this for at least 5 minutes, til it's tripled in volume.


And it gets nice and pale, fluffy and lemon colored.
Add the vanilla and mix in.

Then sift the flour and salt over the mixture and fold in with a spatula.


Drizzle the butter into the mixture and stir til just blended.


Pour into your prepared pans and bake 25 to 30 minutes. Since mine was slightly overdone, I suggest you check after about 20 minutes. It should be springy to the touch.
Cool in pans 10 minutes, then remove them from the pans and cool completely.
Once cooled, spread the whipped cream filling on the bottom layer. Place the other layer on top.

Make the yummy ganache.


And cool it to room temperature.


Then spread it on top of the cake and chill til serving time. ( Or cut yourself a big piece because..well.. somebody has to try it and it may as well be you. You worked very hard to make this and you deserve it! ( Then take the rest to the neighbors..share!).

Boston Cream Pie

6 large eggs, at room temp.
3/4 cup plus 2 tbsp. sugar
1 tsp. vanilla
1 1/2 cups sifted AP flour
1/4 tsp. salt
4 tbsp. unsalted butter, melted
1 1/2 cups heavy cream
6 ozs. semisweet chocolate, chopped

Place the rack in the center of the oven and preheat to 350.
Lightly butter and flour two 9" pans.
1. Combine the eggs and 3/4 cup of the sugarin a large heatproof bowl and place bowl over hot, but not simmering water.
2. Stir with wire whisk until the sugar is dissolved and the mixture is hot to the touch, ( 110 degrees on a candy thermometer.)
3. Remove the bowl from the heat ( I transferred the mixture to a medium bowl), and beat with an elecric mixer for 5 to 7 minutes, til the mixture is cooled and has tripled in volume. It should be very light, fluffy and lemon colored.
4.Beat the vanilla into the egg mixture.
5. Combine the flour and salt and sift over the egg mixture, folding in the flour with a rubber spatula.
6. Gently drizzle in the butter and stir just til blended.
7. Pour the batter into the prepared pans and bake for 25 to 30 minutes ( or less), or til a toothpick inserted into the middle of the cake comes out clean and the top springs back when lightly pressed.
8. Cool the cakes on wire racks for 10 minutes, then remove them from the pan and cool completely on wire rack.
9. Ganache: Heat 3/4 cup of cream in a small saucepan until it starts to simmer. Remove the pan from the heat and stir in the chopped chocolate, until it's melted and smooth. Set aside to cool to room temp.
10. Whipped filling: Beat the remaining 3/4 cup of cream with the remaining 2 tbsp. sugar, until soft peaks form. Put one cake layer on your serving plate and spread with whipped cream.
Put the second layer on top. Gently pour the chocolate glaze over the top, allowing some to drizzle down the sides.


Monday, June 21, 2010

Coconut Macaroons

I've never made coconut macaroons before, not that I can remember anyway, and when I was flipping through a few old issues of Country Living Magazine, I came across this recipe. It's actually supposed to be Chocolate Coconut Macaroons, but it's so hot today, I just thought the chocolate would end up in a gooey melted mess. Better to save the chocolate for a cooler day!
I was hoping to be inspired to make something to celebrate the first day of summer but I couldn't find anything too exciting.
I began making the cookies, starting with beating the egg whites but they never really got to a stiff peak stage, as the recipe says they should. It was then that I ran to the computer to look up other Coconut Macaroon recipes and discovered there are a lot of versions. Some say to mix the egg white without even beating it. Some add flour, some not.
So I figured I might as well keep going, whimpy peaks and all!
Well, they came out very good, although I had to increase the baking time, but it could just be my oven.
I tasted one after it cooled a few minutes and it was really good. The outside was a little crunchy and the inside was soft. I think I could have baked them even a little longer. But I popped them into the fridge, where they will stay til they're all gone!
I hear objections to coconut all the time. Seems you either hate it or love it! My son, Kris, said something interesting after he tried one tonight. He said, "I love coconut but I only love it when I can get a big burst of it, like in this cookie!" He said he didn't like it when there's just a little bit of it in something. Hmm..I kind of know what he means! Oh and..Happy First Day of Summer!

So, to make these cookies you first need to whip the egg whites til soft peaks form.


Then gradually add the sugar in a steady stream and mix til well blended.
Add the vanilla and continue to beat until the mixture becomes soft and glossy peaks form.
Add the flour and beat til stiff peaks form ( mine never got to that stiff peak stage).
Gently fold in the coconut and allow the mixture to rest for 10 minutes.


Place on parchment lined baking sheet and form into a pyramid shape with your fingers.
They remind me of little haystacks!
Bake til golden brown, about 13 minutes. ( Mine took longer).
Chocolate Coconut Macaroons ( from Country Living Magazine, June 2001 issue).
Makes 20 cookies

2 large egg whites
1/2 cup sugar
1/2 tsp. vanilla
2 tbsp. AP flour
2 1/2 cups sweetened, shredded coconut
3 1/2 oz. bittersweet chocolate
1 tsp. vegetable oil
Preheat oven to 350. Line baking sheet with parchment paper.
1. In a large bowl, with mixer on medium speed, whip the egg whites til soft peaks form.
2. With mixer running, gradually add the sugar in a steady stream and mix til well blended.
3. Add the vanilla and continue to beat til mixture becomes soft and glossy peaks form.
4. Add the flour and beat til stiff peaks form.
5. Gently fold in the coconut. Let the mixture rest for 10 minutes.
6. Place heaping tablespoonfuls ( not too big), spacing a few inches apart. Pinch each small mound of batter into a pyramid shape. (Dampening your fingers really helps. They're sticky!)
7. Bake til golden brown, about 13 minutes. ( Mine took longer).
8. Let the cookies rest on the baking sheet for 2 minutes. Transfer, with parchment paper, onto wire rack to cool.
To dip in chocolate:
Place chocolate in a heatproof dish over simmering water or in the top of a double boiler.
Melt, stirring occasionally, to prevent burning.
Remove from heat and stir in the oil.
Dip the tip of each macaroon into the melted chocolate.
Place onto a wire rack to cool til set.
Store in airtight container for up to a week. ( I like them stored in the fridge).