Tuesday, January 1, 2013

Black Eyed Pea Cakes... Happy New Year!


Happy New Year !
It's been quite a while since my last post and I felt today was a good time to begin again. Kind of a new beginning, although I can't promise I'll be posting every day, I will do my best! My cookie business kept me so busy this year, I just couldn't find the time to bake and post many new ideas.
  
So, in keeping with the tradition of the new year, as you may already know, in the South, they eat black eyed peas on New Years Day to bring luck and prosperity, a great idea, I think, and this recipe is a really good one.
I found the recipe on a bag of Vidalia onions a while back and decided to give it a try. Now, we're hooked and make these quite a lot.


The recipe says it serves 4 as an entree or 8 as an appetizer but I actually halve the recipe and it makes 4 nice size cakes, which is enough for 2 people.

You'll need to drain and rinse your beans first.

 Then throw half of them into a food processor with a little bit of heavy cream. Then, in a medium bowl, add the other half of the beans and the rest of the ingredients and place it into the fridge for at least an hour.
Forms the cakes and coat with panko bread crumbs and fry.
So good!


 Black Eyed Pea Cakes

2 cans of black eyed peas, drained, rinsed and divided
1/4 cup heavy cream
1 small Vidalia onion, finely diced
2 cloves of garlic, minced
1/2 cup finely chopped green bell pepper
1/2 cup finely chopped red bell pepper
1 tbsp. finely chopped parsley
1 tsp. finely chopped basil
1/2 tsp. cayenne pepper
1 1/2 tsp. salt
2 cups panko breadcrumbs
4 tbsp. unsalted butter
4 tbsp. olive oil
**************************
1. Combine half of the peas and the heavy cream into a food processor fitted with a metal blade and pulse til smooth.
2. Transfer the mixture to a large bowl and add in the remainder of the ingredients up to and including the salt. Stir to combine and place into the fridge for at least an hour.
3. Form the mixture into 8 patties and coat each side with the panko.
4. Heat a skillet over medium heat and add in 2 tbsps. butter and 2 tbsps. olive oil. Fry half the patties for about 3-4 minutes on each side. Transfer to a warm plate.
Note:  You may need to push them together a little as they fry. Don't fry them over too high a temp. as the panko will brown too much!
5. Wipe out the pan with paper towels and add in the remaining 2 tbsps. each of butter and olive oil. Fry the remaining 4 patties. Enjoy!

Thursday, August 30, 2012

Sunday in New York - Eataly

A few Sundays ago we took advantage of a beautiful day and ventured into NYC. I wanted to see an exhibit in the Guggenheim Museum and decided to walk the 30 blocks ( one way!) from where the free ferry bus dropped us. I didn't realize the only way to be able to ride the city bus was to have exact change of quarters only...so with no other choice but to walk...walk we did!
The first stop to rest some weary feet was Central Park. So many families are out and about on Sunday, playing in the park, sailing their toy boats and having just a great time.

After seeing the exhibit of abstract art at the Guggenheim, next stop was Eataly.
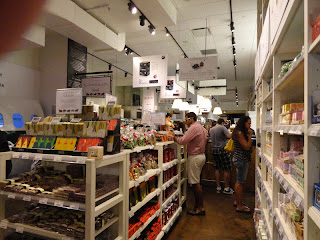
If you've never been, it's a fabulous marketplace of artisinal Italian food and wine. Very upscale, meaning very pricey, but amazing. The place was extremely busy, it was Sunday after all, and I suggest if you ever want to go, pick a weekday for a less crowded market.


The breads , cheeses, pasta...everything looked delicious.
There are several areas to sit down and have a meal, even an upstairs.


Lots of different cookies, biscotti, chocolate and just about anything Italian you can think of.
The place is huge so be sure to wear comfortable shoes!

I can't wait to go back...with plenty of quarters for the bus ride!


Wednesday, July 25, 2012

Peach Pie..Deconstructed

I love Peach Pie but sometimes a whole pie is just too much! Plus with this idea, no chance for soggy crust bottoms!
Here's a great idea...a kind of deconstruction of a pie, using the same ingredients, just in a different way.

First make your favorite pie crust ( recipe below), or divide the dough into 4 pieces ( for tart shells).
Roll out the dough, dock it ( poke holes in the dough using a toothpick or a fork) and throw it into the refridgerator or freezer.

Then once it's thoroughly chilled, cut out your shapes, such as rounds or squares or free form it and bake it til it's golden brown.
You can then make a delicious filling, such as the mascarpone one I made or even easier, just top with whipped cream and then the sliced peaches...Easy and so good!

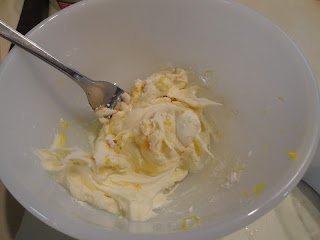
I love mascarpone and this filling recipe is quick, light and lemony and not too sweet.


Peach Pie...Deconstructed

Makes enough for 4 tartlette shells* or much more 4"rounds!

Pie Crust

6.3 ozs. AP flour
3 tbsp. sugar
1/4 tsp. salt
1/4 tsp. lemon zest
3.5 ozs. unsalted butter, cold and cut into 1/2" pieces
1 large egg yolk
1/2 tsp. vanilla extract
1/2 tsp. lemon juice
3 tbsp. ice water
**********************
1. In a small bowl, rub together lemon zest and sugar with your fingers til thoroughly moistened.
2. In a food processor or mixing bowl, combine the flour and salt.
3. Add the lemon zest/sugar mixture and blend.
4. Add the butter pieces all at once and pulse or combine with fingers, pastry cutter or fork til mixture resembles coarse meal.
5. In a small bowl or glass measuring cup, mix the egg yolk, vanilla extract,  lemon juice and ice water together.
6. Drizzle the wet mixture over the dry til just combined.
7. Roll out the dough to approx. 1/8" thickness ( or divide into 4 pieces  for tart shells),   flouring if necessary as you roll.
8. Pop the dough into the fridge or freezer and when thoroughly chilled or frozen, preheat your oven to 375 and take the dough out and let it sit on the counter a few minutes, or til it's soft enough to cut into shapes.
* If making tartlettes, place the dough into the shells after rolling out, then freeze.*
   (If your oven isn't yet to temperature, place back in the fridge while waiting.)
Be sure to dock or poke your dough to prevent the dough from puffing up too much, allowing steam to escape.
9. Bake til golden brown, approx. 12 to 13 minutes, depending on your oven.
10. Cool before topping.

Mascarpone Filling:

Mix or whisk in a small bowl:
1/2 lb. ( 8 ozs.) mascarpone cheese
2 tbsp. confectioners' sugar
1 tsp. lemon juice
1/2 tsp. lemon zest
1/4 tsp. vanilla extract
Scoop filling onto cooled crust shapes ( or spoon into tart shells)  then top with:
Sliced peaches ( or any other fruit you like), and finish off with whipped cream or even sour cream is great! Enjoy!


Wednesday, April 18, 2012

Spring...time for Rhubarb!


Rhubarb will soon be popping up everywhere and I thought this would be a perfect time to revisit some of my rhubarb recipes...just to get you ready and set to bake with this amazing and beautiful veggie/fruit!

The first is this delicious rhubarb mini tart experiment I made that uses a prebaked crust for less crust sogginess!
This shortcake was so so good!


Then the rhubarb and strawberry muffins with a streusel topping...one of two rhubarb muffin recipes.


What to do with leftover scones? Make a custardy, light yummy rhubarb bread pudding.


And to wash it all down...how about a cool refreshing rhubarb lemonade This lemonade is my favorite. It's a great combo of lemons and rhubarb with just the right amount of sweetness.


How about an unusual combo of tarragon and rhubarb from France's Food and Wine Magazine? Give these a try.


And last...how about a rhubarb cookie? Sounds a bit crazy, but they make a great sandwich cookie...kind of like a rhubarb whoopie pie!

So, there are some great rhubarb ideas to get you started...Happy Baking and Happy Spring!

Thursday, March 29, 2012

Coconut Cupcakes with Toasted Coconut Frosting

Our warmer Spring like weather here in the Northeast has everything blooming so much earlier..which is so nice! And it puts me in the mood for something baked with coconut, so I made these cupcakes into jumbo sizes rather than the standard size, which I tend to do a lot.  Definitely a taste of Spring in every bite!

This recipe comes from Martha Stewart and the only change I made was to add a bit of coconut extract to the batter to up the coconut flavor. I also decided that the frosting recipe probably was going to make too much so I not just halved it this time, but I made one fourth of the amount and it was perfect. But keep in mind that we don't like lots of frosting on our cupcakes so you may want to make the full amount.


Coconut Cupcakes with Toasted Coconut Frosting ( adapted from Martha Stewart)
Makes 12-14 standard size cupcakes or 6-7 jumbo cupcakes

1 3/4 cup (8.0 ozs.) AP flour
2 tsp. baking powder
1/2 tsp. salt
1/2 cup packed sweetened shredded coconut
3/4 cup ( 1 1/2 sticks) unsalted butter-room temp.
1 1/3 cups sugar
1 1/2 tsp. vanilla
1 tsp. coconut extract ( my addition)
2 large eggs plus 2 egg whites- room temp.
3/4 cup unsweetened coconut milk
***************************
Preheat oven to 350. Fill muffin pans with paper liners.
1. Whisk the flour, baking powder and salt in a medium bowl.
2. Place the shredded coconut into a food processor and pulse til finely ground, then whisk into the dry ingredients.
3. In a mixing bowl, cream the butter and sugar til pale and fluffy on medium high speed.
4. Gradually beat in whole eggs, egg whites, vanilla and coconut extracts, scraping bowl occasionally.
5. On low speed, add flour mixture in 3 batches, alternating with coconut milk, beating after each addition, til well combined.
6. Scoop batter into muffin liners, filling about 3/4 full.
7. Bake approx. 20 minutes, or til tester comes out clean. Cool completely before frosting.
Frosting:
Note: I thought this amount of frosting makes a lot so I actually made one fourth but I think if you halve the amounts you'd have enough, but giving you the full recipe and let you decide.
 2 sticks unsalted butter-room temp.
1-2 tsp. coconut extract
approx. 32 ozs. confectioners' sugar
3-4 tbsp. cream or milk or coconut milk
1. Cream butter, then beat in sugar and extract.
2. Add milk til the frosting reaches desired consistency. If too thin, add more milk, if too thick add more sugar.
Sprinkle the tops with toasted coconut flakes or chips. Enjoy!

Friday, March 16, 2012

Irish Whiskey Cake

I had a request to make something for one of my customers for a few St Patrick Day's parties they would be going to this weekend so after we agreed on Irish Soda Bread , I researched online for another idea...and that's when I came across an Irish Whiskey Cake.

I checked out a few different recipes and decided on one called Grandmother Monahan's. It is the same as a few others I found so I'm guessing someone just wanted to make it more Irish with that name, but call it after whomever you wish, this is one delicious and boozy cake!

I used the real thing, Jameson's Irish Whiskey, which is available at every liquor store in these parts.

One step you'll need to do the day before is to soak the raisins in the Irish Whiskey with the lemon zest so there's a little prep to do. Other than that, this is really a very simple cake to make and your guests will love it. It is a nice dense yet moist cake and the whiskey glaze is definitely gilding the lily!

I made this cake for us first to be sure it was a keeper of a recipe...which it is...and the first step should be to beat the egg whites til stiff. Unlike what I did, I suggest you beat them with a hand held beater in a large bowl to keep the standing mixer bowl free.


Once the batter is mixed together, add in a scoop of the beaten whites and stir by hand to lighten the batter, then fold in the remaining beaten whites gently.


Scoop the batter into a parchment lined tube pan and spread the top to even it out.


It gets a nice browned top but only rises about halfway up.
Let it cool about 20 minutes in the pan, then lift out and place on a wire rack and poke holes into the top and brush with..what else..more whiskey!  After it cools completely, then drizzle on the glaze.

Irish Whiskey Cake ( adapted from allrecipes)

Cake:
1 1/2 cups golden and  dark raisins combined (the original recipe calls for 2 cups but I think this is too much)
3 tbsp. lemon zest
1/4 to 1/2 cup Irish whiskey
12 tbsp. (6 ozs.) unsalted butter, softened
1 cup brown sugar (I used light brown)
3 eggs, separated, room temp.
1 1/2 cups (6.8 ozs.) AP flour
1/4 tsp. salt
1/4 tsp. cloves
1 tsp. baking powder
Glaze:
2 cups confectioners' sugar
Juice of one lemon
Enough whiskey and a little warm water to make the correct consistency.
*Note: This is the original recipe amount for the ingredients for the glaze but I halved the amounts above and it made plenty of glaze.
Cake:
The day before: Place the raisins and lemon zest in a shallow bowl and pour the 1/4 to 1/2 cup of whiskey ( depending on how strong you want it) over the raisins and zest and stir. Cover with plastic wrap and let it sit overnight.
The next day:
1.  Preheat oven to 350. Line a tube pan with parchment paper by cutting a square piece large enough to fit down into the tube pan, cutting out a circle for the center of the pan. Press the folds as best you can to make the parchment stay in place.
2. Beat the egg whites til stiff. Set aside a minute.
3. In a mixing bowl, cream the butter and sugar til light and fluffy.
4. In a small bowl, combine the flour, salt, cloves and baking powder.
5. In a small bowl, beat the egg yolks with a fork or whisk.
6. Gradually add the egg yolks to the butter mixture, alternating with the flour and raisin/whiskey mixture.
    Mix well but don't overmix.
7. Add a few scoops of the beaten egg whites to the batter to lighten it up a little, then fold in the remaining beaten whites gently.
8. Scoop the batter into the pan and using an offset spatula, even the top.
9. Bake til cake is nicely browned on top and a tester comes out clean.
10. Cool the cake in the pan about 20 minutes, then lift out and place on a rack. Poke holes in the top with a toothpick and brush a little more whiskey over the top.
Cool completely before drizzling on the glaze.
*To store:I found this cake kept well for several days in a covered tin.
To make the glaze:  
Combine the confectioners' sugar and lemon juice, then add the whiskey and warm water, a little at a time til you get a nice smooth glaze consistency. Enjoy!

Tuesday, March 13, 2012

Happy Pi Day!

Happy Pi Day! Well, I bet you would have thought I'd make a sweet pie rather than a savory one...but Chicken Pot Pie can be so delicious and this recipe from the Barefoot Contessa is just a great one.
The crust is light and flaky and the filling is rich and creamy...real comfort food!

I decided to have some fun decorating the crust so I cut out the "Pi" symbols with the left over dough and cut out the word "Pi".  It actually turned out so cute that we hated to dig in to it...but dig in we did and we managed to finish the entire pie.

I have to mention a few notes. I did halve the original recipe and still wound up with about one cup of filling left over and I even omitted the whole small onions. I used leftover chicken I had from the night before. Also, Ina's recipe was for 4 individual pies and I made one big one, using a glass pie dish.

So, here's hoping you have a great "Pi" Day! ( And Happy Birthday Einstein!)


This crust is really easy to make and so delicious...light and flaky. See those tiny bits of butter in the dough? That's what makes a great crust.


I almost left the pie like this...then I got the brilliant idea to add the "Pi" symbols.


Comfort food at its best.


If you're going to make a pie today...how about this one!

LinkWithin

Related Posts with Thumbnails