Friday, July 23, 2010

Chocolate Chevre Brownies

I've been dying to try a recipe using chevre in a brownie ever since I watched the Throwdown episode with Bobby Flay vs. The Vermont Brownie Co.
Last week I got some more chevre from a local farm, Flint Hill Farm. They set up at the same Farmer's Market I do on Saturdays. Rebecca was kind enough to give me some of their goat cheese..well, we sort of barter..cookies for cheese! A great deal all around!
So I made a batch using this recipe but after I made it I realized it uses canola oil rather than butter. ( I know..duh! I didn't realize this til I had them in the oven!) The brownies came out really pretty good but I wanted to make a nice chocolatey rich brownie using butter so I chose the brownie recipe Bobby Flay made for the Throwdown, not using his peanut butter filling, of course! (I did omit the 2 ozs. of chopped bittersweet chocolate that he adds to his recipe. I didn't want any chocolate chunks in my brownie but if you do, just add it in.) I used the chevre filling from the oil brownie recipe, however, because it was really good.

The tangy taste of the chevre with the not overly sweet chocolate brownie is a really great combination.

Please note: I halved the recipe because I only had enough goat cheese to make half and I baked mine in an 8" x 8" pan. The recipe I am giving you is for this halved amount. Since I didn't make the full size recipe, I didn't want to just give you the recipe for the full amount as I felt maybe it would turn out a little differently from mine.

Let the brownies cool completely in the pan, then lift them out of the pan with the foil and place them in the fridge to get nice and cold before you cut them. It's so much easier to cut them cold.
I think the flavors really come out after a day ( I made them last night) and when they're at room temp. But, hey, some of you like cold brownies and that's okay with me! Just try them though. They're that good!


And..yes! they were sure fun to photograph! I had trouble deciding which one of these 3 photographs to use...so I just used all 3! Which picture is your favorite? Do any of them want to make you want to take a bite?

So let's begin.
Start by making the chevre filling. Take your chevre out of the fridge and let it come to room temp. so it softens.
Then mix it with the powdered sugar, egg and flour. Then beat it with a fork or whisk til it's nice and smooth. If it's still a little thick, add a teaspoon of milk. Set it aside, on the counter, while you make the brownies.

Over barely simmering water, double boiler style, melt the butter, unsweetened chocolate, 1 oz. bittersweet chocolate and espresso powder, stirring occasionally. Once melted, remove from the heat and let it cool down.
In a large bowl, whisk the eggs, both sugars, vanilla and salt.
Whisk in the melted chocolate mixture.

Beat in the flour in 2 additions.
Stir in the remaining 2 oz. of chopped bittersweet chocolate ( if using).


Spoon half the batter into a prepared pan and drop dollops of chevre filling on top.


Spoon the rest of the batter over top and, using a knife, swirl the filling with the brownie mixture.
Bake about 23 minutes or til the top is set but still a little soft. Insert a toothpick into the center. It should come out with a few moist crumbs. Place the pan on a wire rack to cool completely, then lift out of the pan and chill to make cutting easier.

Chocolate Chevre Brownies ( adapted from here and Bobby Flay's Throwdown recipe)
Chevre filling:
6 oz. chevre, room temp.
1 tbsp. powdered sugar
1 large egg
1 tbsp. AP flour
1 tsp. milk ( if the mixture seems too thick).
Brownie Base:
1/2 cup ( 1 stick) unsalted butter, cut into chunks
3 ozs. unsweetened chocolate, coarsely chopped
1 ozs. bittersweet chocolate, coarsely chopped
2 ozs. bittersweet chocolate, coarsely chopped, (optional)
1/2 tsp. espresso powder
2 large eggs
3/4 cups sugar
1/4 cup light brown sugar ( Bobby's recipe called for Muscavado sugar but I used light brown)
1 tsp. vanilla
Pinch of fine salt
1/2 cup AP flour
Preheat oven to 350. Line an 8"x 8" pan with foil, allowing extra to overhang on sides to lift out brownies. Spray foil lightly.
Chevre filling:
1. In a small bowl, beat the softened chevre, powdered sugar, egg and flour til smooth. If the mixture seems a little thick, add a teaspoon of milk. Set aside while you make the brownie base.
Brownies:
1. In a double boiler, melt the butter, unsweetened chocolate, 1 oz. of bittersweet chocolate and espresso powder, over very low simmering water, stirring occasionally. Set aside to cool 5 minutes.
2. In a medium bowl, whisk the eggs, both sugars, vanilla and salt.
3. Whisk in the cooled melted chocolate mixture.
4. Beat in the flour in 2 additions.
5. Stir in the 2 ozs. of bittersweet chocolate , (if using).
6. Spoon half the batter into the prepared pan.
7. Spoon dollops of chrvre filling on top, then spoon remainder of batter over top and swirl with a knife.
8. Bake for 23 to 25 minutes, or til a toothpick inserted in the center comes out with a few moist crumbs and the edges are puffed.
9. Cool brownies completely in pan on a wire rack, then place into the fridge to get nice and cold, making it easier to cut pieces.


Thursday, July 22, 2010

Ginger Scones with Almond Topping

I'm still working from Nick Malgieri's book "The Modern Baker" and this time I've chosen a scone recipe. I make lots of scones each week for the Farmer's Market but I always like to try someone else's recipe. Kind of helps reassure me that my scones are really pretty darn good!
I changed the technique for making these scones a little bit. I just went back to the procedure I use all the time since I have that pretty down pat by now!
Instead of mixing everything in the food processor, I mix just up to and including the butter stage, then I transferred the dough to a bowl and mixed the wet into the dry ingredients with a fork, then a spatula. I also used a different method for the topping. Other than that...it's the same!

They really are a nice tender and light scone and I love the little taste of cinnamon with the ginger. I sprinkled some raw sugar on the top, too.
I halved the recipe ( which makes 9 scones) and I made only two today and froze the rest to bake at a later time. Freezing them makes it so convenient to be able to have them ready to bake whenever you feel like a few. You'll just have to add more time to the baking.
Begin by placing the dry ingredients into the bowl of a food processor.
Give that a pusle to mix everything.
Add the pieces of butter and pulse a few times to break up the butter into smaller pieces ( the size of peas..as they say!).


Then ( and this is where I changed the prodecure), transfer the dough into a large bowl and add the crystallized ginger pieces.


In a separate bowl, mix the milk and eggs together...

Add the wet ingredients to the dry (butter) mixture.

And using a fork first, mix it gently, almost in a folding motion, scooping the mixture from the bottom and bringing it up and over the top. Mine needed more milk so if yours seems a bit dry just add more milk about a tablespoon at a time til it gets a nice, fairly moist and sticky look. Just be careful not to overmix the dough!

Then switch to a rubber spatula and scoop out the dough onto a floured work surface, getting all the dough from the bowl.

You will need a bench scraper at this point so go get one ready!
Flour your hands and the bench scraper and form the dough into a rectangle.
Cut the rectangle into 3 pieces all the same size. You'll need to reflour the scraper as you cut.

Then cut each piece in half diagonally to form a triangle shape.
Flouring the scraper once more, scoop up the triangle and place it onto the parchment paper lined baking sheet. ( This is where I take the dough and place it onto a piece of waxed paper to freeze. Once it's frozen, I transfer it to a zip lock bag for later baking. And there's no need to thaw the dough. It can just go from the freezer straight into the oven. You can place the topping onto the frozen scone just before baking).
If you're baking all the scones right away proceed with the topping.
Brush the tops with a little milk or half and half ( if you have it) and sprinkle the almond slices on top, crushing them just a bit. Then sprinkle with a little raw sugar, then a little cinnamon...and pop them into the oven...finally!
Bake them for about 15 minutes or til they get a nice light golden color.
Ginger Scones with Almond Topping ( adapted from Nick Malgieri's book, " The Modern Baker")
Makes 18 scones

Scone dough:
3 1/2 cups AP flour, spooned into measuring cup and leveled
1/3 cup sugar
1 tbsp. baking powder
1/2 tsp. salt
1 tsp. ground ginger
6 tbsp. ( 3/4 stick) unsalted butter, very cold, cut into 12 pieces
2/3 cup crystallized ginger, cut into 1/4" pieces
2 large eggs
3/4 cup milk
Preheat oven to 400 and set rack to middle position. Line a baking sheet with parchment paper.
1. Combine flour, sugar, baking powder, salt and ground ginger in the bowl of a food porcessor fitted with a metal blade. Pulse several times to mix.
2. Add the cold butter pieces and pulse til butter is in smaller pieces.
3. Transfer mixture to a large mixing bowl.
4. Add the crystallized ginger and mix gently.
5. In a small bowl, mix the milk and eggs, then add to the dough. Mix gently with a fork, referring to my notes and photos above. (I did need to add more milk. if yours seems too dry, add more milk a tablespoon at a time and gently mixing with the fork.) Don't overmix the dough!
6. Switching to a rubber spatula, scoop out the dough onto a floured work surface.
7. Using a bench scraper, well floured, form the dough into a rectangle and cut into 3 same size pieces. Then cut these 3 pieces diagonally into triangles, reflouring the scraper each time you make a cut.
8. Place the triangles onto the baking sheet, spacing 2" apart.
9. Brush the tops with a little milk or half and half. Sprinkle with the sliced almonds, crushing them slightly, then sprinkle with a little raw sugar and finally some cinnamon.
10. Bake for approx. 15 minutes or til lightly browned.


Wednesday, July 21, 2010

Ranger Cookies

Ranger cookies have been around for a long time and as far as I can tell no one actually knows how the cookies got their name. My guess would be something to do with the Lone Ranger. General Mills, which produces Cheerios cereal, came out in 1947 with a line of Frontier Town cereal boxes with the Lone Ranger likeness. Different versions of the boxes would have different Frontier Town buildings on the back of the box. Kids would collect them and cut out the buildings. Maybe they created a cookie in his honor, made with Cheerios!

This recipe comes from King Arthur Flour. I halved the recipe and used some generic sweetened flake cereal I had but you could use a crispy rice cereal or cornflakes.
I liked the cookie and the chocolate chips in the cookie was a good addition. I would actually use more next time. The cereal gave it a nice crunch and I chose to use toasted coconut which also helped add to the crunch.
My only objection was it needed more flavor. It was a little bland with no flavor punch. Maybe using more chocolate chips would help or maybe using dark brown sugar as I used light brown. Or if you really like coconut, using coconut extract might add ..something?

Place the butter, sugars, vanilla and salt in a mixer bowl and beat til fluffy.
Add the eggs and beat til smooth.
After mixing the dry ingredients in a separate bowl, add them to the dough and beat til combined.
Then stir in the oats, coconut, chips and cereal til just blended.
The mixture will be very chunky.


Scoop rounded teaspoonfuls ( Mine were very generous teaspoonfuls) onto your prepared baking sheet.

Space them about 3" apart because they will spread.

They flatten out but get nice and crunchy and once they cool, they remain firm.
Bake til they're golden, about 12 minutes. ( Mine took longer, about 14 minutes)

Ranger Cookies ( from King Arthur Flour)

1 cup unsalted butter, room temp.
1 cup light or dark brown sugar
1 cup granulated sugar
1 tsp. vanilla
1 tsp. salt
2 large eggs
2 cups AP flour
1/2 tsp. baking powder
1 tsp. soda
1 cups old fashioned rolled oats
1 cup shredded coconut ( I used toasted coconut)
1 cup chocolate chips ( I used semisweet and I would increase the amount by about 1/2 cup)
3 cups crispy rice cereal or cornflakes ( I used a sweetened flake cereal)
Preheat oven to 350 and line baking sheet with parchment paper.
1.Place butter, sugars, vanilla and salt in a mixer bowl and beat til fluffy.
2. Add eggs, one at a time, til smooth.
3. In a small bowl, mix flour, baking powder and baking soda and add to butter mixture, beating til incorporated.
4. Stir in oats, coconut, chocolate chips and cereal til just blended.
5. Drop by rounded tespoonfuls spacing about 3" apart.
6. Bake til golden, about 12 to 14 minutes.


Tuesday, July 20, 2010

Coconut Pecan Chocolate Chunk Bars

Today I chose another recipe from Nick Malgieri's book, "The Modern Baker". I decided to go with a bar recipe this time. This cookie bar is gooey, chewy and really quite rich! It wasn't the smartest choice for a hot summer day but as long as you keep it in the fridge, it will stay firm. In this heat, everything melts so fast! Guess by now you can figure out I don't have an air conditioned kitchen! The chocolate in the bars starts to melt the second I take it out of the fridge. I actually had to pop the bars in the freezer to get them hard enough to photograph them..quickly!
If you don't like coconut, I think just leaving it out would be fine.
The original recipe also called for bittersweet chocolate chunks, which I didn't have so I just used bittersweet chips and that worked out fine, too.
The bar has a nice kind of shortbread cookie base and using the bittersweet chocolate helps to cut down the sweetness. (I halved the recipe and used an 8"x8" pan.)

To start, make the dough for the base by combining the dry ingredients and set aside.


Then in a mixer bowl, beat the butter and sugar 2-3 minutes.
Then with the mixer on low speed, beat in the dry ingredients til the dough is smooth.
Scoop the dough into your prepared pan and spread it out evenly with a knife, then use your fingers to smooth it out and get it in the corners. ( He says to press the dough down using the palms of your hands! I say ?? I don't quite get how you could do this!).
Anyway, then bake it for about 15 to 18 minutes.


While the base is baking, make the topping by placing the brown sugar in a medium bowl and mix in the eggs with a rubber spatula.

Then stir in the granulated sugar and vanilla.

Fold in the coconut, pecans and chopped chocolate ( or chocolate chips).


Once the base comes out of the oven, set it on a wire rack. Let it cool about 10 minutes.
Spoon the topping on and spread it out over the base.
Then pop it back into the oven for another 20 - 25 minutes.
Coconut Pecan Chocolate Chunk Bars (from "The Modern Baker" by Nick Malgieri)

Dough:
1 1/2 cups AP flour, spooned into measuring cup and leveled
1/2 tsp. baking powder
1/4 tsp. salt
6 oz.(1 1/2 sticks)unsalted butter, softened
1/2 cup sugar
Topping:
1 1/4 cups light brown sugar, firmly packed
4 large eggs
2/3 cup granulated sugar
2 tsp. vanilla
2 2/3 cups (7 oz.) sweetened shredded coconut
2 cups pecan pieces, coarsely chopped
12 oz. bittersweet ( not unsweetened) chocolate, cut into 1/4" to 1/2" pieces
Preheat oven to 350. Line a 9 x 13 x 2 inch pan with parchment or foil and butter bottom and sides. Allow extra foil for overhang to lift out bars once baked.
Set rack in the lowest level of the oven.
1. Dough: Stir together flour, baking powder, salt and set aside.
2. In a mixer bowl, beat butter with the sugar on medium speed til soft and light, 2-3 minutes.
3. On the lowest speed, beat in the flour mixture, scraping the bowl, til the dough is smooth.
4. Spoon the mixture into the prepared pan and spread it out with a knife or spatula, then press very lightly with your fingers to get into the corners.
5. Bake approx. 15 minutes, ( mine took a few minutes longer), til puffed and set and beginning to color.
6. Set the pan on a rack and let it cool while you make the topping ( if you've already made the topping, still let it cool about 10 minutes. Do the dishes..or something!).
Topping:
1.Place the brown sugar in a large bowl and use a large rubber spatula to work in the eggs, one at a time, stirring til smooth after each.
2. Stir in the granulated sugar and vanilla, then fold in the coconut and pecans.
3. Fold the chocolate chunks into the topping, using a small strainer to sift away any dust formed by the chocolate ( although I don't think chocolate dust is a bad thing!). (I used chocolate chips.)
4. Spoon the topping onto the prebaked dough and spread evenly over the top.
5. Bake til the filling is set and nicely colored, about 20 to 25 minutes. ( Mine took a little longer).
6. Cool in the pan on a rack. Lift the bar onto a cutting board before it has cooled completely.
7. Cut into 2" squares..oops! I cut mine way bigger! Because it's so rich, 2" squares is really a good idea!
As I stated above, I kept mine in the fridge. The book says to keep at room temp. if your serving them within a day. If not, wrap and freeze and bring to room temp. before serving them (which would take about 2 minutes in my kitchen!) Enjoy!


Monday, July 19, 2010

Butterscotch Chocolate Chunk Cookies


Mondays can be nice quiet days for me as far as baking goes. It's the beginning of the work week and it's a day I usually like to experiment with different recipes since I can take my time playing around with different recipes.
I'm always looking for other chocolate chip cookie recipes to try, so I decided to take out a cookbook from the library yesterday because this cookie recipe sounded so good!
It's from the book, " The Modern Baker" by Nick Malgieri. There are lots of recipes in the book I'd love to try..if only I had more time! But these cookies are definitely worth making. His technique is a little different, too.
The butterscotch name, and flavor, comes from the use of only brown sugar in the recipe. There's no white sugar used, so the caramel flavor really comes through among tons of chocolate chunks, that is!
And if you like a chocolate chip packed cookie, this one's for you! There are so many chips and chocolate chunks in the cookie that it's truly a chocolate lover's cookie. The original recipe calls for using bittersweet chocolate chunks and milk chocolate chunks but I only had bittersweet chocolate chips and semisweet chocolate that I chopped into chunks.
Still, a fabulous cookie. I loved the crunch on the outer edges and the soft gooeyness in the center. Perfect for me..and Kris managed to inhale quite a few!
A word about the baking...I decided to try baking a few first, just to see how accurate the baking time in the book was compared to what my crazy oven did! Well, I'm glad I did because based on the size of the cookie, I only needed to bake mine for 11 minutes, rather than the stated 15 minutes! My oven was running a little hot, I do admit, so perhaps if your oven is very accurate the 15 minutes would be fine. I would keep an eye on them after 11 minutes though, just in case they're browning too much.
But even though my first batch looked like they were in too long, they actually came out the best, for me. They kept the nice outer crunch thing I love, whereas the next batch I found didn't brown as much and came out a bit too soft for my liking.

I know this is getting long winded so I'll wrap things up! But one last note. I have some more of the batch in the fridge waiting for tomorrow. I know with alot of chocolate chip cookies, it's best to let them stay overnight in the fridge so I thought I'd test out a few. I'll let you know if they are any different tomorrow.
**Update on the overnight stay in the fridge: The cookie came out exactly the same as when baked yesterday so it doesn't seem to make a difference in this cookie recipe. So go ahead..make 'em, bake 'em ..and enjoy the chocolatey goodness!**


First stir your dry ingredients together in a small bowl and set aside.

Then place the butter, brown sugar and vanilla into a mixer bowl and beat with the paddle attachment on medium but only til just mixed.
Note* Don't overbeat this mixture since he says overbeating will make this type of cookie rise and then flatten out during baking.*

Then, once the dough is combined, stir in the flour by hand, using a large rubber spatula.


Then stir in the chopped chocolate chunks.


The dough will be soft ( at least in my hot kitchen in the middle of summer the dough is soft). If you're making these in the winter time, perhaps the dough will not be as soft!
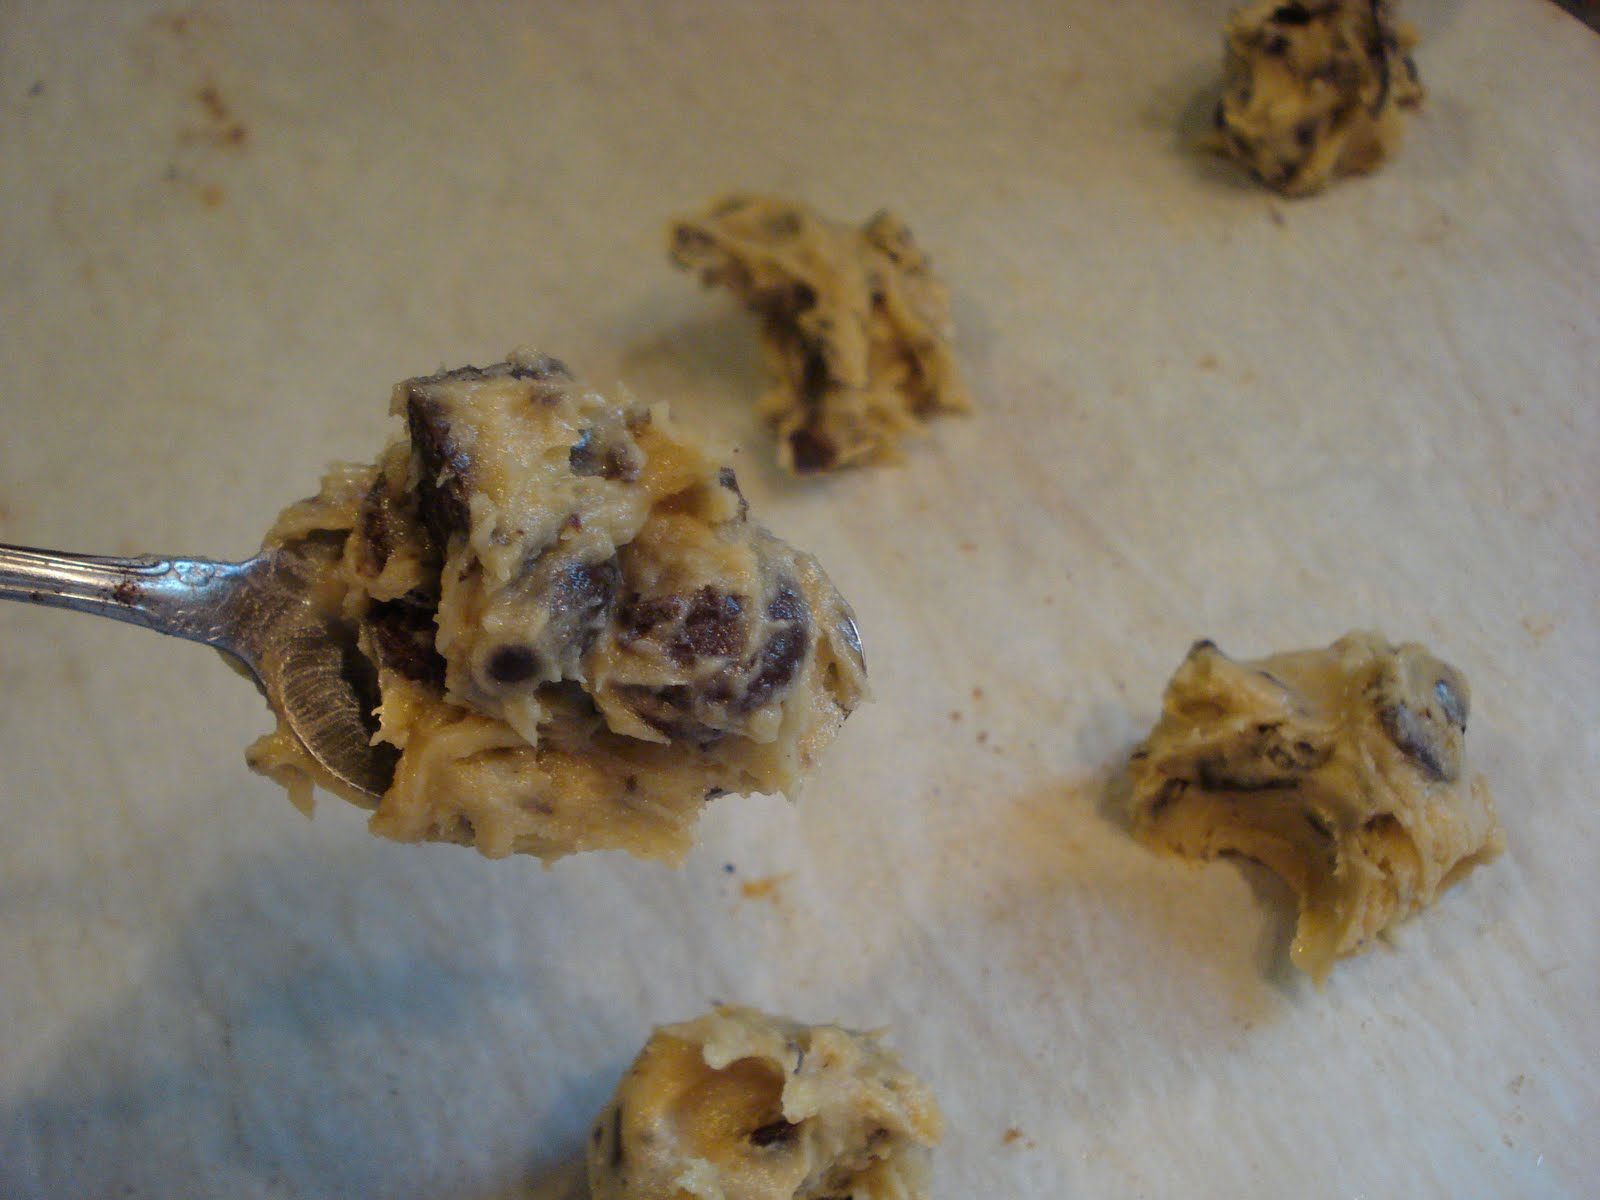
Scoop teaspoonfuls and place on a parchment lined baking sheet, spacing about 3" apart.
Butterscotch Chocolate Chunk Cookies (from," The Modern Baker" by Nick Malgieri)
Makes about 4 dozen, depending on size


1 1/3 cups AP flour, spooned into cup and leveled off
1/2 tsp. baking soda
1/2 tsp. salt
10 tbsp. (1 1/4 sticks) unsalted butter, softened
3/4 cup light brown sugar, firmly packed
1 tsp. vanilla
1 large egg
6 oz. bittersweet ( not unsweetened) chocolate, cut into 1/4 " pieces
6 oz. milk chocolate, cut into 1/4" pieces ( I used semisweet chocolate)
Set racks ( if doing 2 batches at once),to upper and lower thirds of the oven. Preheat to 350.
1. Stir flour, baking soda and salt together and set aside.
2. Combine butter, brown sugar and vanilla in the bowl of an electric mixer and beat, with paddle attachment, on medium speed til just mixed, then beat in the egg.( Don't overbeat. *See note above).
3. Remove the bowl from the mixer and using a rubber spatula, stir in the flour mixture by hand, then stir in the chocolate.
4. Drop teaspoons of the dough, spacing 2"-3" apart.
5. Bake til they are spread, well risen and golden, about 15 minutes ( mine took less, see my notes above).


Saturday, July 17, 2010

Pecan Crunch Pie


I wasn't quite sure how this pie was going to turn out. When I first read the ingredient list, it sounded a little...unusual, to say the least. And even the fact that it's called a pie, when it's actually more like a cake, added to it's interesting appeal.
I found the recipe in the cookbook I often go to for something a bit unusual, which may explain it's uniqueness! The book, "America's Best Lost Recipes" is, as you may know if you read many of my posts, one of my favorites. The whoopie pie recipe from the book is the best!

So, after reading all the notes on the recipe, especially the one about being careful not to overbake the pie, I gave it a try. And while we're on the subject of overbaking, I want to say that every time I read this in a recipe, I get nervous and tend to underbake what I'm baking!

The pie is quick to prepare, there's no crust to worry about because everything goes in the pie plate together ( which is why I think it's more like a cake), and it just has that old fashioned simplicity. Oh and yes, it's very good, a little sticky, a little chewy, not too sweet and the pecans give it a wonderful crunch. With a big scoop of vanilla ice cream...yum!


Place the graham crackers in your food processor to make the crumbs easily or if you don't have a processor, place them in a zip lock bag and crush them with a rolling pin or some other heavy object! Set them aside for a minute.


Place eggs, sugar, baking powder and vanilla in a mixer bowl and ...


Beat til tripled in volume about 5 minutes.


Fold in the graham cracker crumbs and pecans.


Once nicely folded in...


Spoon it all into your prepared pie plate.


Bake til well browned on top, about 30 minutes ( and remember...don't overbake!).

Mine came out nice and puffy but the center sank after a few minutes, which was actually okay. But, maybe I should have baked it a few minutes more. If any of you out there try this recipe, let me know how yours turns out..please!


Pecan Crunch Pie ( from America's Best Lost Recipes)


3 large eggs

3/4 cup sugar

1/2 tsp. baking powder

1 tsp. vanilla

1 3/4 cups finely ground graham cracker crumbs, approx. 11 whole crackers*

1 1/4 cups pecans, toasted and chopped


Adjust oven rack to middle position and preheat oven to 350. Grease a 9" pie plate.


1. Crush the graham crackers, as noted above, and set aside a minute.

2.With mixer in high speed, beat together the eggs, sugar, baking powder and vanilla til thick and tripled in volume, about 5 minutes.

3. Using a rubber spatula, fold the graham crackers and pecans into the egg mixture.

4. Spoon the filling into the prepared pie plate and bake til well browned on top and a toothpick inserted in the center comes out with a few sticky crumbs attached, about 30 minutes.* (It's best to remove the pie from the oven while it's slightly underdone. The residual heat will allow the pie to continue to cook.)

5. Transfer to a wire rack and cool completely, about 1 hour. Serve with vanilla ice cream or whipped cream.

* Note: Do not use prepackaged graham cracker crumbs*


LinkWithin

Related Posts with Thumbnails